Tuesday, July 8, 2014

The Only Good Way To Eat Lentils

Eat less meat! they say. Eat more beans! they say. Yuck! I say. Beans aka legumes are not my favorite whole food. I don't digest them as well as other foods and they are not as appealing to me, yet I still try to incorporate them into my diet for good measure. One palatable way to enjoy more beans is by roasting lentils. This makes them crunchy and you can add as many and different seasonings as you like to give them some much needed flavor :)

I have my dear friend, Hannah, to thank for sharing the idea and recipe of Roasted Lentils. I did add soaking and sprouting as an extra step to the process with the intention of making them more digestible. You see, beans have "natural agents that protect them from early germination that can wreak havoc in our digestive system. Soaking and sprouting replicated germination, which activated and multiplies nutrients (particularly Vitamins A, B, and C), neutralizes enzyme inhibitors, and promotes the growth of vital digestive enzymes." This is just one of many links where you can go to get more information on soaking and sprouting legumes and where I got my quick info from. http://www.vegetariantimes.com/blog/how-to-soak-and-sprout-nuts-seeds-grains-and-beans/

I will give you the recipe first so you can see how easy it is to make Roasted Lentils. It truly is simple and very flexible as you can fine tune it to your taste buds and to whatever seasonings you have on hand.

Let's start with one cup of dry lentils for now just in case you don't like it or the recipe fails for some reason. I use a one pound bag (2 cups) because I liked them so well and wanted to keep extra on hand for a quick snack :)

One cup of dry lentils cooked (boiled) until soft. Drain. Pour into a mixing bowl and add a little olive oil and seasoned with whatever seasonings sound good to you. I use salt, pepper, garlic powder, and onion powder. Give them a stir and spread in a thin layer on a cookie sheet and season again if you'd like (I do). Bake at 400* for about 30-40 minutes stirring every 10 minutes. Set your timer for the 10 minute stir because they do easily burn! Feel them to check for dryness. When they are getting close, I will turn off the oven leaving lentils in the oven, and let them cool down as the oven cools down. Tada! that's it! I store my lentils in a glass jar IF there's any left (especially if you're only doing a one cup batch).

Now, to soak and sprout. You must do this BEFORE cooking the lentils. Here's what it will look like.

Rinse one cup of dry lentils:


Place rinsed, dry lentils in a glass jar or bowl and cover with lots of water. Let sit on your counter over-night or for at least 7 hours:


After a good soak, you will need to drain them in a colander and then give them a rinse and let drain. Cover with a dry towel and place a plate under the colander to catch any left-over drips. Let sit on your counter. You should rinse, drain, and cover twice a day until you see tiny little nubs or sprouts coming out from the lentils. This usually takes a day or two depending on the warmth of the kitchen. Hmm...it is hard to see the little sprouts in this photo but they are there! Click on the photo to enlarge.


After they have sprouted is when you would give them a quick boil just until they turn soft. Drain, mix lentils, oil, and seasonings in a bowl, then spread on cookie sheet, season again for good measure, and proceed to bake/roast:


Don't forget to check and stir every 10 minutes! Set your timer! The finished product should look like this:


Enjoy! ~ Lisa


Tuesday, July 1, 2014

Water Kefir & Grains Part Two.

In my last post I introduced you to water kefir; what it was, its benefits and how to keep them alive and healthy.


In this post we will discuss how to finish the fermenting process of the water kefir grains and turn it into a chilled, sweet, fizzy, fruity beverage. Sound good? It is.

After the kefir water has sat on your counter for 48 hours or two days you will need to drain the water off into quart jars. I use two. Using a small mesh strainer over a clean, empty jar carefully pour off the liquid catching the grains. I also use a larger strainer to dump my strained grains into because of the amount of grains I have the small strainer won't hold them all. Note the "empty" jar on the left side of the photo. Yeah, I have that many grains :P You only need 1/4 cup of fresh grains per quart jar.


Second ferment: After the grains have been strained it is time to add the fruit or fruit juice of your choice. So far we have experimented with fresh watermelon, fresh and frozen peaches, fresh cherries, fresh strawberries, fresh ginger, grape juice, and apple cider. The grape juice is my favorite, then peach, and then apple cider. The possibilities are endless!


In the photo above I have added one cup of apple cider (frozen and thawed) and one tablespoon sugar to the jar with the cap on it and am getting ready to add ingredients to the second jar. There are a few things to remember as you make kefir. One is to not fill the jar completely full of water. You will need to leave room for grain growth and for the fruit or fruit juice you are adding. Two is that for the second ferment you will need to tightly cap the jars to create carbonation. Leave the jars sit out on the counter for 24 hours, chill, and serve.

Rinse the grains in cool water, wash the empty quart jar (or jars), add 1/4 c. sugar, 1 t. molasses, warm water just enough to dissolve the sugar (about 1/4 of the jar), stir to mix, add cool (heat will destroy the life of the grains) water to fill jar about 1/2  to 3/4 full keeping in mind that you will need room to add fruit or fruit juice in the second ferment. Cover the jar with paper coffee filters held on with rubber bands and let the jar sit on the counter for 48 hours. Repeat the straining and second ferment process.

And don't forget, you can use the extra grains in smoothies, eat them plain, or share them!

If you have any questions please email me.
Happy fermenting and experimenting ~Lisa


Monday, June 30, 2014

Water Kefir & Grains Part One

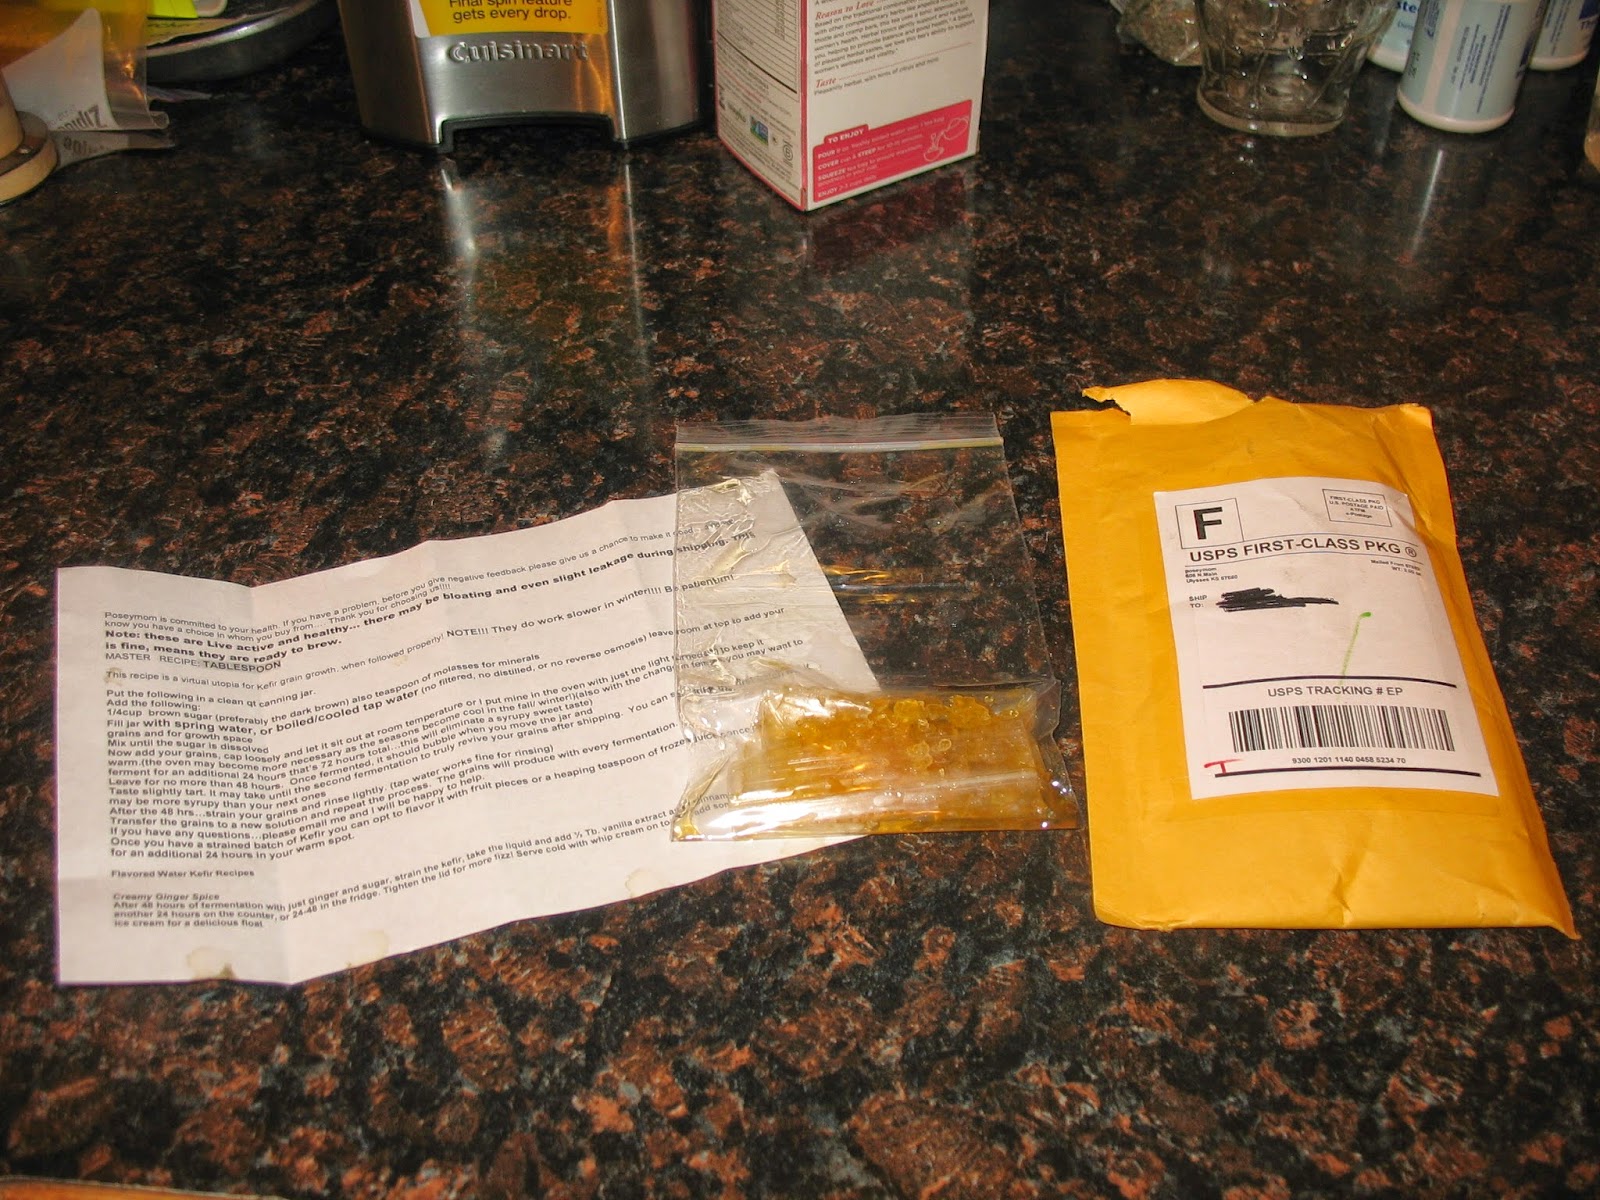
A while ago my husband ordered some kefir WATER grains for me.


Eww, what is kefir WATER grains you ask.

Well, first of all I want to make the distinction between water kefir and milk kefir.

Milk kefir is a beverage made by fermenting milk. Think liquid yogurt if you will. Milk kefir is made with a yeast/bacterial fermentation starter also known as "grains". This process results in a pro-biotic drink full of vitamins, some minerals, and lactic acid bacteria. I will not bore you with an exhaustive list of the benefits of milk kefir. You can do that yourself so check out the internet if you wish to know more :)

Now, let's get to the purpose of this post and talk about water kefir.

Water kefir is also a pro-biotic beverage but without the milk. "What!?, you ask. How is this so. I thought pro-biotic meant milk and dairy."

Well, here's the good news; pro-biotic doesn't always mean milk or dairy. Good news for all of the people who for whatever their reasons may be have made the decision not to consume milk. We can still get healthy pro-biotcs naturally without taking a pill :) This is very good news indeed.

Tibicos aka water kefir is a culture of bacteria and yeasts. Sound familiar? As with kefir grains, the microbes present in tibicos act in symbiosis to maintain a stable culture. Tibicos can do this in many different sugary liquids, feeding off the sugar to produce lactic acid, alcohol (ethanol), and carbon gas, which carbonates the drink. Rest assured, I am not promoting alcoholic beverages or drunkenness :P But we all know the benefits of a glass of wine or an occasional beer. Water kefir offers the many benefits of the good bacteria and yeasts but without the dairy or consuming alcohol. It's all good, folks :) If you wish to learn more you should use the internet to read about the many benefits of water kefir. Start here:  http://www.culturesforhealth.com/water-kefir-grains-composition-bacteria-yeast

Water kefir is a cold, fizzy, sweet drink made with fruit or fruit juice and it will, on occasion, smell a tad bit like alcohol. The alcohol content is usually significantly less than one percent depending on how long you leave it to ferment. It's common sense, folks :)

The grains are living organisms so they need to be fed with 1/4 cup of sugar, 1 teaspoon of molasses and fresh water every other day. The photo shows brown sugar but I have been using turbinado. Any sugar will do but both the turbinado and brown sugar contain molasses and the grains love it. It's a shot of minerals to the growing grains. They will grow or multiply like crazy so you will need to either eat them as they are very nutritious and some people put them in their smoothies or you can also keep them in short-term or long-term storage. I won't go into detail in storage know-how in this post as it has become longer than I wanted it to be and I'm getting tired of writing. lol


In addition to eating or storing them you can share :) That is the purpose of this post. I would love to share good health with all of my friends if you have the interest and are game for the offering. The grains are free of charge unless I need to ship them and in that case you will pay the shipping and handling. I am willing to answer any questions you may have in getting you on your way to good health in addition to making different flavors of the fizzy stuff. Did I mention that this beverage can and is used in place of soda pop? My favorite flavors have been grape and apple cider. Peach runs a close third :)

Oh dear me, I just realized that I don't have any photos of straining and making the actual flavored beverage also known as the second ferment. I will take some pics and make another post. *nods*

Water Kefir Grains:


Here's to good health and learning something new everyday. Stay tuned for part two of Water Keifr & Grains~ Lisa


Thursday, June 12, 2014

Hitting the Restart Button

Well, it has been more than six months, more accurately....4.6 years. So many good things have happened during this period of time.

My oldest (M) married a lovely young lady (E) in 2011. The next one (K) married a wonderful young man (G) just a year later in 2012. First grandchild/son born in 2012. And before all that, starting in 2009, there were several big life-changing moments happening. Higher Ground: A youth ministry started by youth for youth founded by K & E. Then there were the weekend long gatherings we hosted for homeschooled older teens and young adults. These events proved to be true blessings in many ways. Daughter, K, meeting a boy in a Christian band. Concerts. Many concerts. Many late-night concerts. Oh the memories :) I still have one daughter (KT) at home. She will enter her 12th and last year of homeschooling this Fall. She is a blessing to me and our family. She has picked up her sister's torch with Higher Ground and the ministry is expanding. She works, plays, takes photographs, and keeps me busy with her schedule. It is time for her to learn how to drive. :)

Children growing into teens, teens growing into adults, weddings, new families, babies, young adult friends' weddings, and babies, friends, new church, new friends, new and many more adventures. My ideas, thoughts, and ways have been challenged, altered, broadened, tempered, proved, and some snuffed out. It is God who works in us molding us if we let Him.

And through all this I still had to cook. And plan meals, do dishes and keep up with the home. I'm still interested in food, nutrition, health related topics, family, relationships, God, and learning in general. This blog will be a reflection of my interests and food experiments. It won't be profound but it will be real, honest, sometimes silly, and sometimes serious.


“Food, fun, love, laughter, and wild plans come together in this kitchen”

Thursday, December 3, 2009

Six months

I can't believe that it has been six months since my last post. Thanks to gentle prodding, I am going to try and post more often. I need to do this for my own interest as well. Cooking can become very mundane if we aren't careful. Sharing this blog with you all helps to give a purpose to a very ordinary necessity in life.

I will be making a homemade ranch dressing and sharing it with you. This dressing will have a lot of enzymes in it because it is made with raw ingredients. There is no MSG or chemicals in it. Some recipes take a few days to prepare the ingredients to be able to post all at once so stay tuned.

Lisa

"Healthy habits aren't a burden. They're habits. "With habituation, one can get used to anything" observed an 8th century Indian pundit, Tsong Khapa. Now, chose one new diet goal for yourself that you want to become a habit."

Friday, June 19, 2009

Angel Food Cake


We didn't want to throw out the 12 egg whites that were seperated from the 12 egg yolks for the ice cream, so we made angel food cake.

Recipe for 12-Egg-White Angel Food Cake (taken from recipeland.com)

1 1/4 cups cake flour* sifted
1 3/4 cup sugar
1/2 teaspoon salt
12 large egg whites (room temperature)
1 1/2 teaspoons cream of tartar
1 1/2 teaspoons vanilla extract
1/2 teaspoon almond extract (optional; we used it)

In bowl sift together flour, 3/4 cup sugar and salt.

Re-sift 3 times. Set aside.

Beat egg whites until foamy.

Add cream of tartar and continue to beat until soft peaks form.

Gradually beat in remaining 1 cup sugar, 2 tablespoons at a time, until mixture holds stiff peaks.

Fold in vanilla and almond extracts. Add 1/4 flour mixture at a time, folding gently with rubber spatula.

Gently spoon batter into ungreased 10-inch angel food cake pan.

Cut through center of batter 2 or 3 times with spatula to remove air bubbles.

Bake at 350* 40-45 minutes or until top springs back when touched with finger and wood pick inserted near center comes out clean.

Invert pan over bottle or inverted funnel and let stand until thoroughly cool. (The new pans have little legs, so there is no need to use bottle.)

When cool, loosen sides and center with metal spatula & turn out onto platter.

Makes 10-12 servings.

*To make your own cake flour, put 2 tablespoons of corn starch into 1 cup and fill rest with flour. For the 1/4 cup add 1 1/2 teaspoons corn starch and fill rest with flour.
Posted by Picasa

Tuesday, May 26, 2009

Roasted Beets


You start with just regular ol' dirty beets.

Chop tops off, rinse beets, put in dish. Greens are there too.

Rinse and spin greens.

Cooked beets! They go in the 250-degree oven for 2 hours, or until soft enough to slice easily.


Peel and slice cooked beets.

Puts lots of butter on them. :D (Cover and keep warm.)


Greens in pan with much butter.


They cook down a lot. This is after sauteeing.

Posted by Picasa